Step 1 - Buy a domain name from Namecheap.com
You can buy a domain name as cheap as $1 per year. Prices of domain names depend on a lot of factors but these are the most common reasons why some are expensive:
- Top-Level Domain (TLD) like .com are one of the most expensive domain names. The cheapest domain names are around $8.88.
- The shorter the domain name, the more expensive its. Think of domain names like fb.com, t.co (twitter), etc. For example, my domain name ron.sh costs around $35 when I bought it (because there was a discount).
- One-word domain names are expensive. For example, voice.com was sold at $30 million.
Step 2 - Create a DigitalOcean Account
Create a DigitalOcean account for your web hosting. You may use my referral link here.
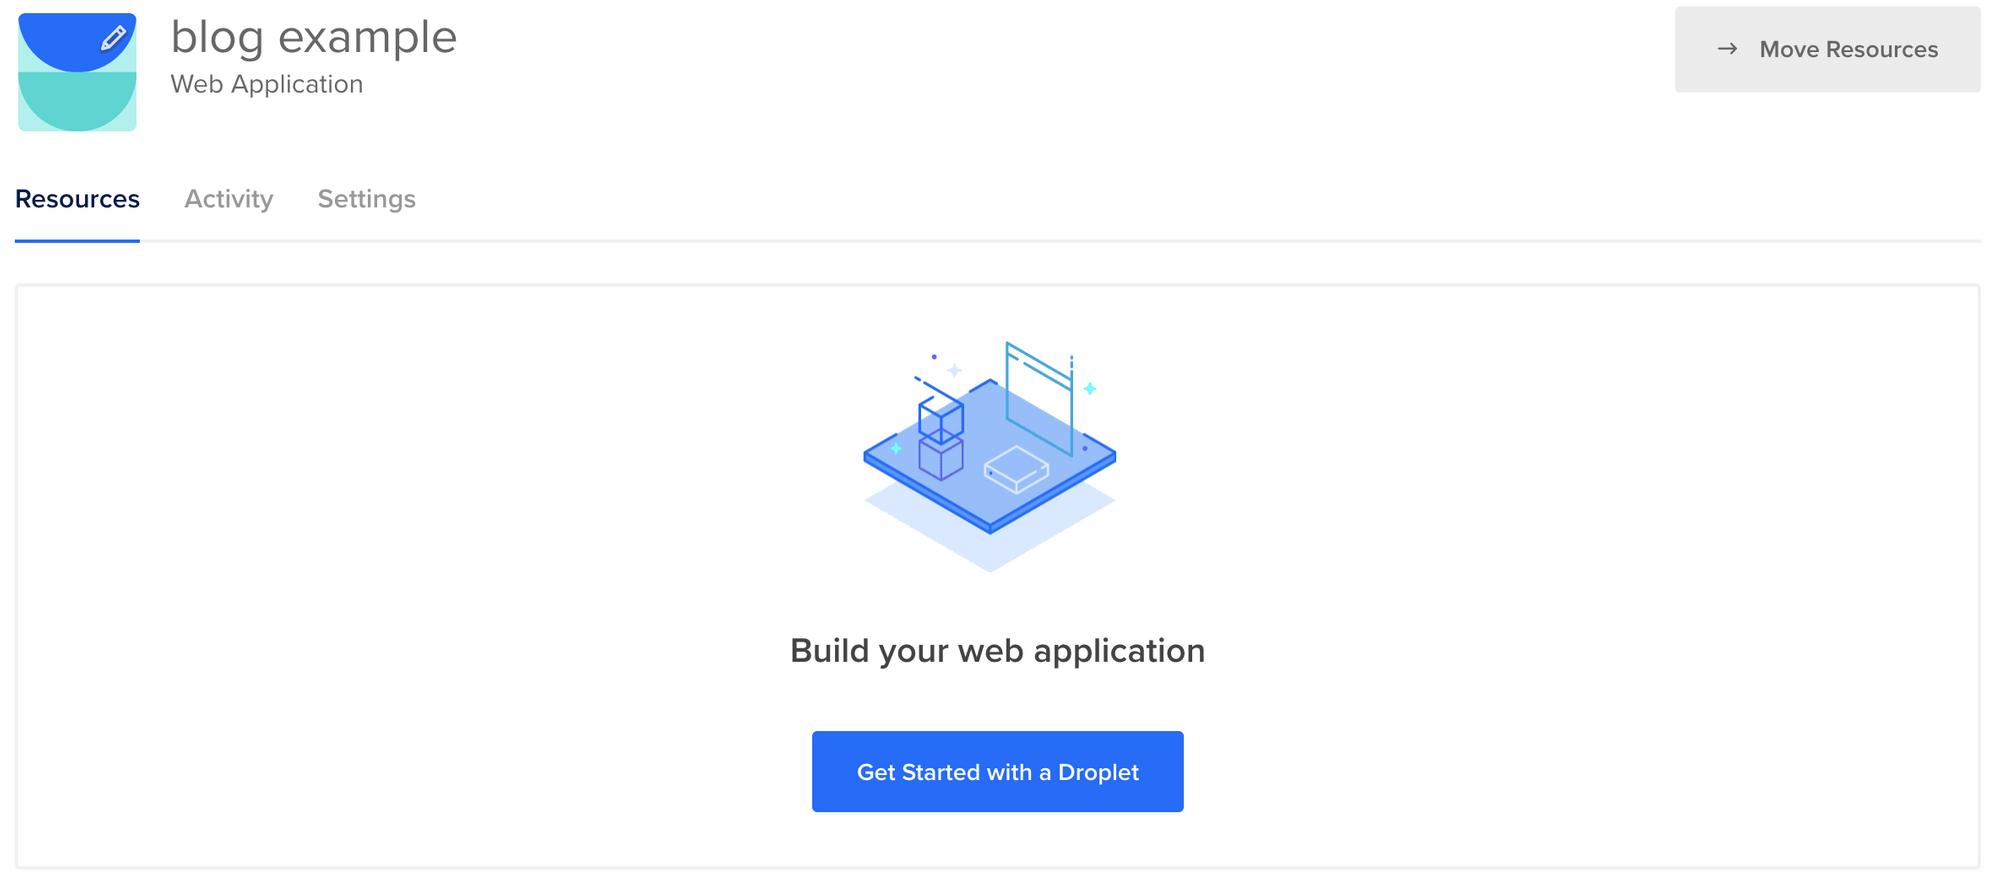
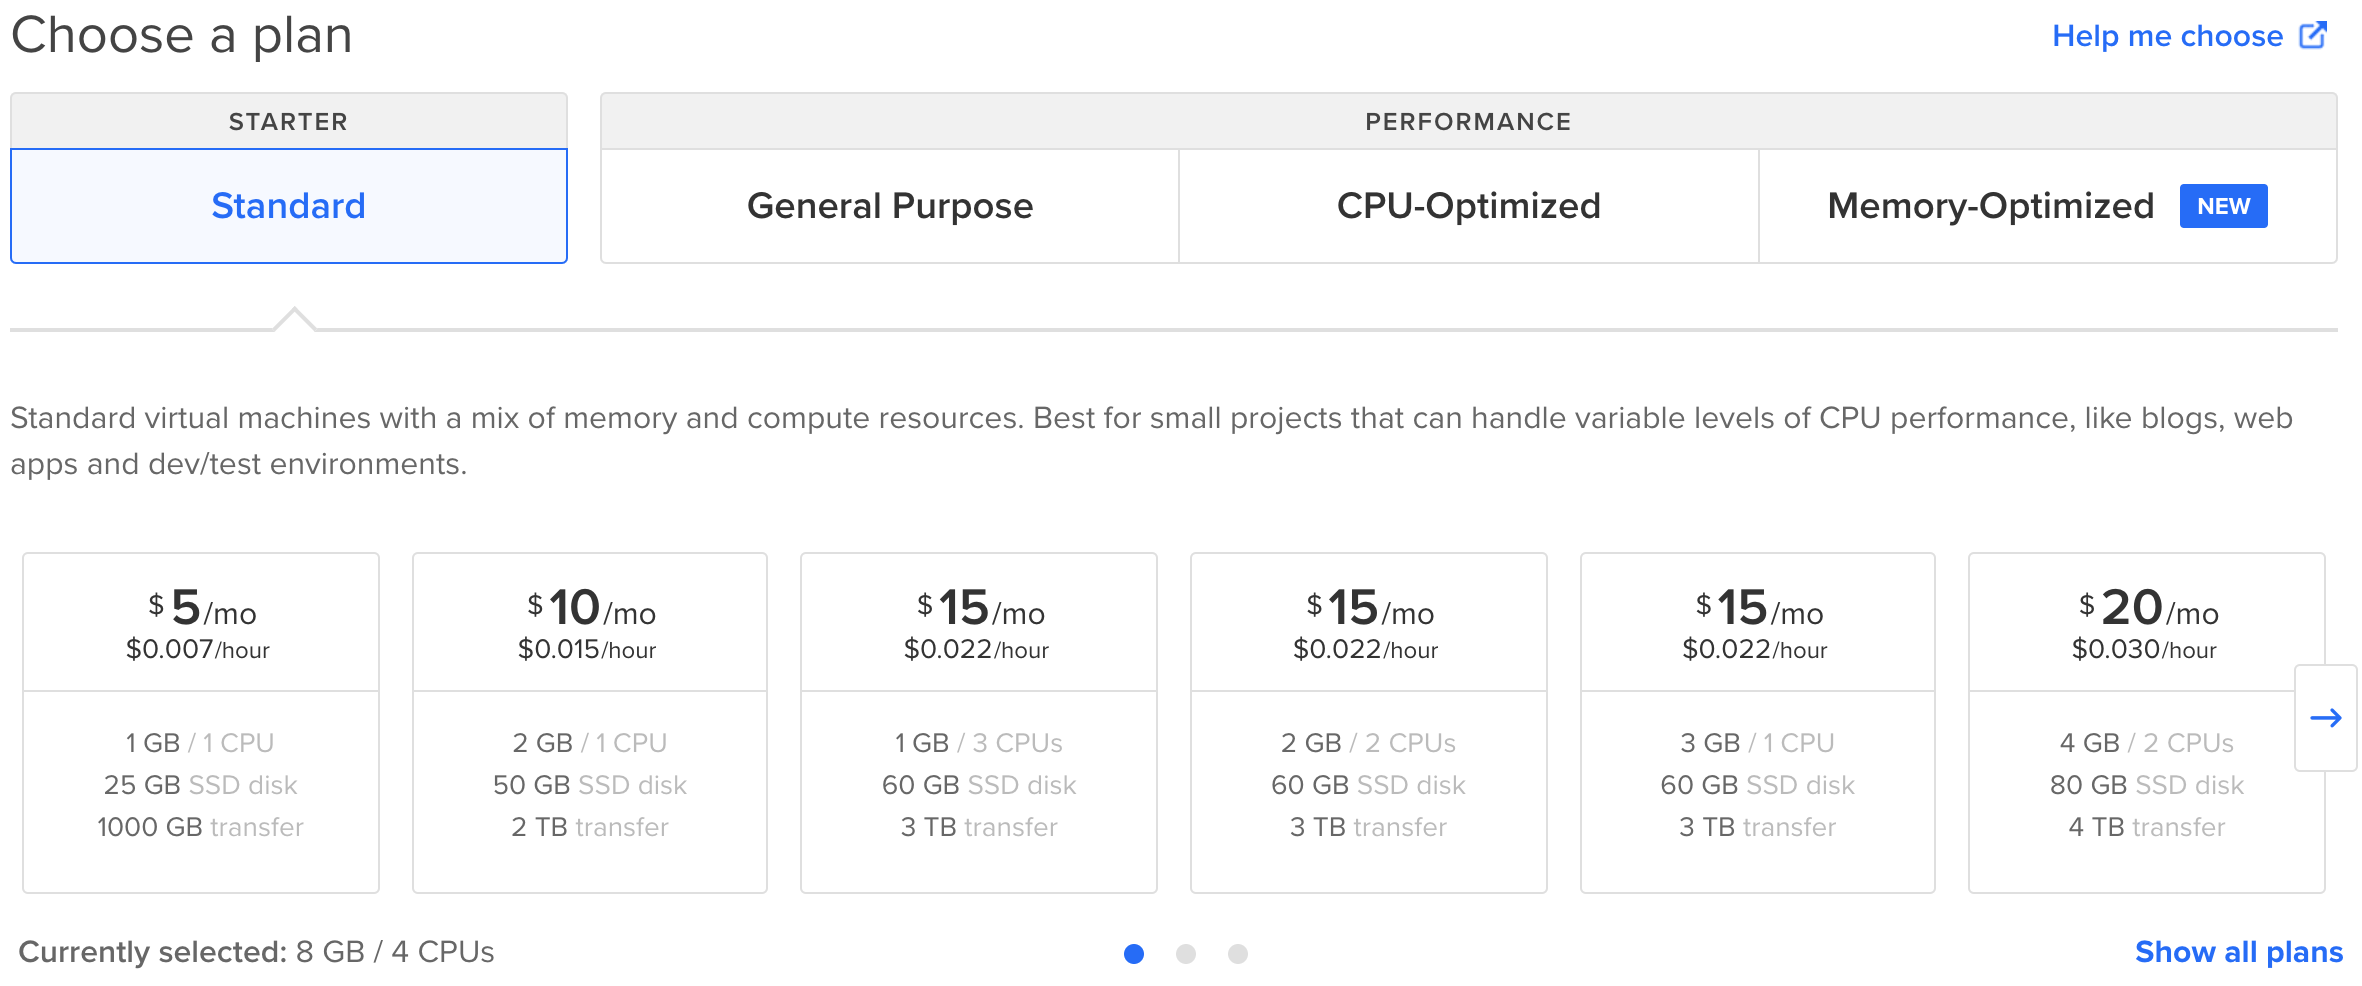
Step 3 - Create a Droplet
You may skip this step if you do not need it yet. Later, you will need to point your domain name to a droplet after setting the DNS.
Click Get Started with a Droplet.
The cheapest plan costs at around $5 per month and that will be enough to setup a simple web server.
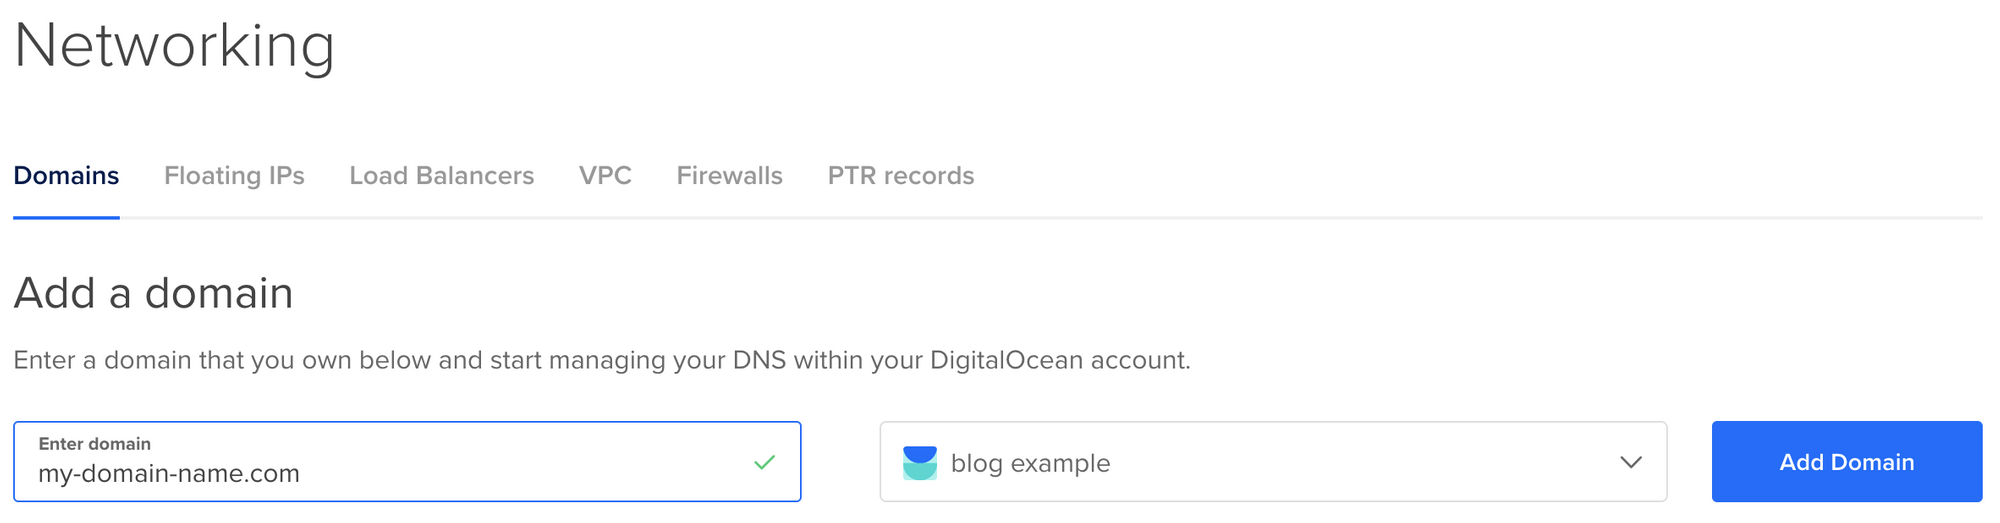
Step 4 - Setup DNS
- In DigitalOcean dashboard, click Networking, enter your domain name you bought from Namecheap.com. Press Add Domain button.
2. Under HOSTNAME, enter "@" and select the droplet in WILL DIRECT TO input then click Create Record button.
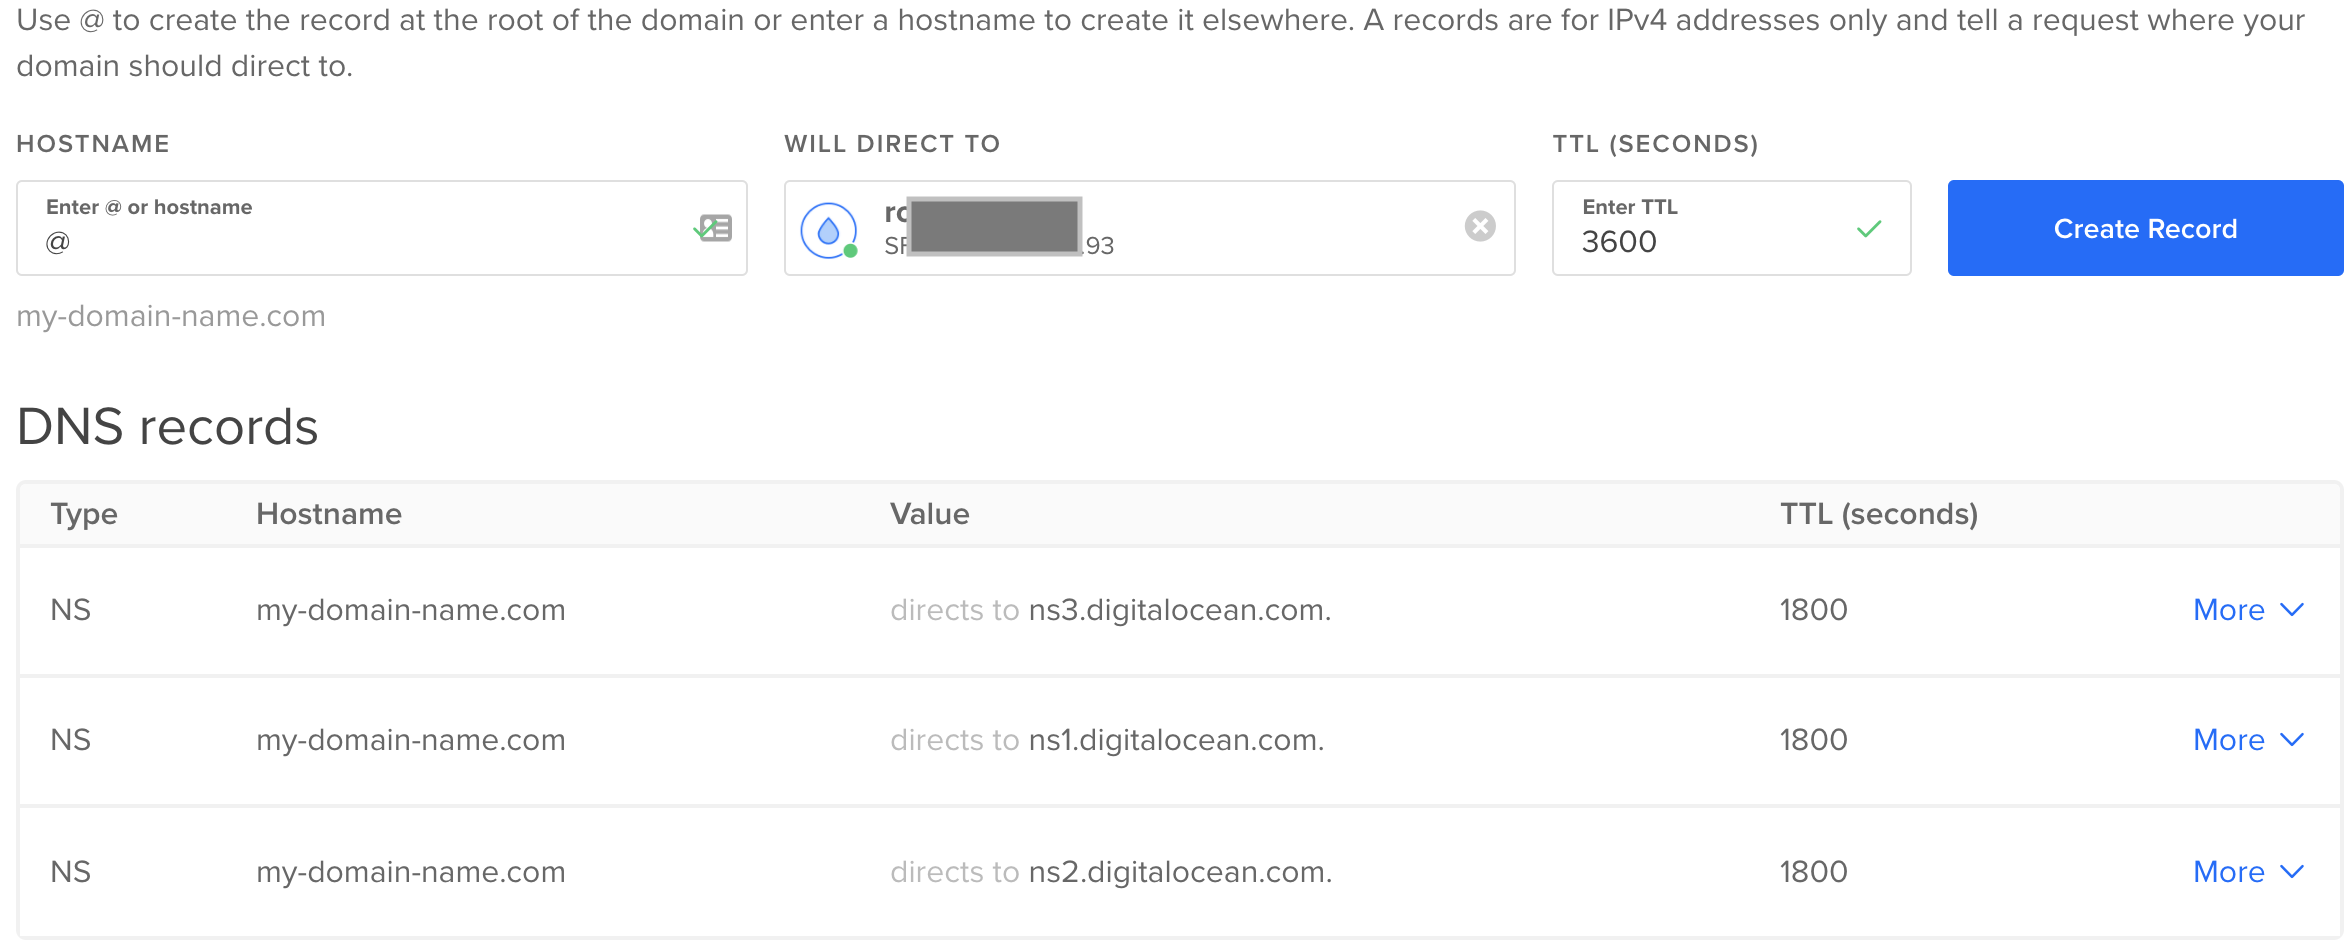
3. Login to your Namecheap.com dashboard, find your domain name and click Manage button. Under Domain > NAMESERVERS, select Custom DNS and enter the following and click a check button that will popup beside Custom DNS:
ns1.digitalocean.com
ns2.digitalocean.com
ns3.digitalocean.com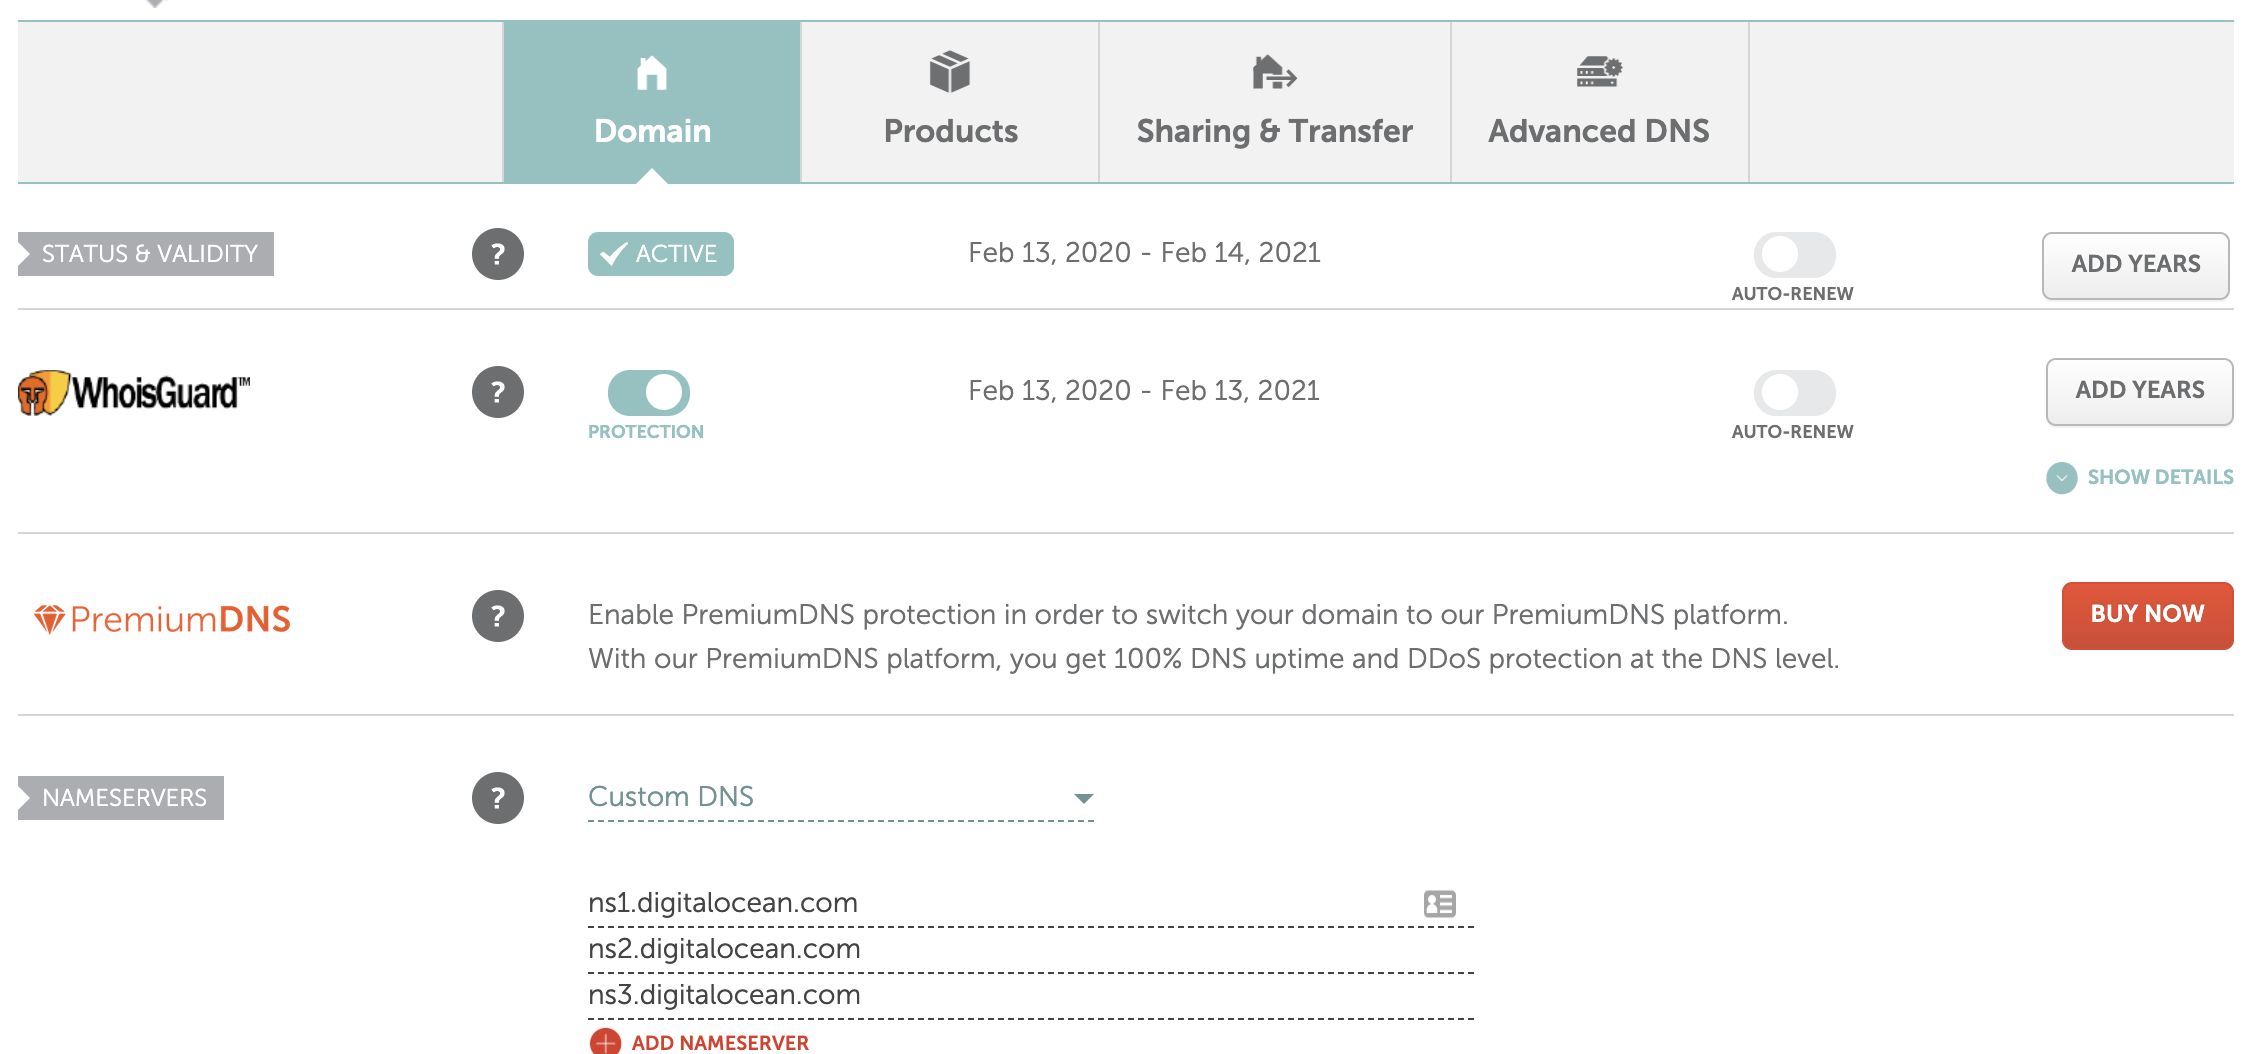
STEP 5 - Verify
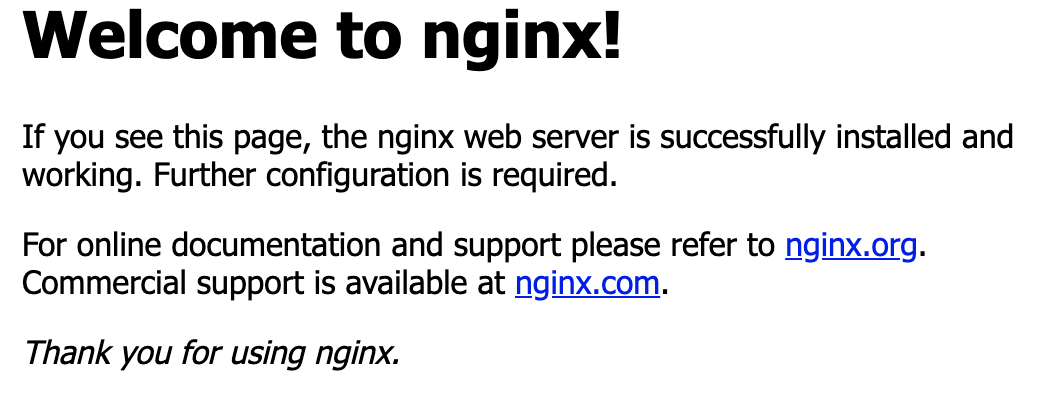
By default DNS will propagate after about 24 hours but based on my experience, it will just take a few minutes with Namecheap and DigitalOcean. Since most droplets come with Nginx installed, you will see the following when you navigate your browser to your domain (e.g. http://my-domain-name.com). If you are not successful, wait for a few hours up to 24 hours then try again.